
Hook, Line and Tester - Pro Tips for Testing with Real Data
- Jessica Ramirez
- Jun 7, 2023
- 3 min read
If you are working in a data driven Marketing Automation ecosystem, you already know that testing data workflows can be a real challenge. Traditionally, testing complex data logic in Braze for automation involves manufacturing internal test data that represents the expected logic of your Canvas paths and steps. The downside of that approach is that test data is often generated based on your Canvas data requirements, not the actual data that will be flowing through the Canvas once launched.
While using internal test data is still a useful tool for overall Canvas and journey testing, there is a better way to accurately test your canvas entry properties and data flow controls. To see how your real users will flow into the Canvas once launched using a “blank” Braze to Braze webhook – insert oohs and ahhs here. By using “blank” webhook message steps (in place of your intended message channel) you’ll be able to see exactly how many users entered your canvas and how many messages will be sent at the top level of your canvas – without sending live messages. This method is not only easy to execute without development knowledge or API Keys, but it also uses zero data points! (BONUS POINTS!)
Gone Testin’
New to the world of webhooks? We’ve got you covered. Here is how to test your Canvas entry and first step workflows using Braze to Braze webhooks with real user data and without sending live messages and without using data points:
Step 1 – Create a Canvas Flow in the Braze dashboard and configure the Entry Schedule, Target Audience, and Send settings. Be sure to configure your events and event properties for Action-Based delivery.
Step 2 – Build the Canvas variants and subsequent Flow Controls as needed (Decision, Audience, Action, and experiment paths) from the Canvas entry point.
Step 3 – Add all Message components following the initial Flow Controls. These Message components should be configured to Webhooks. This will enable data flow testing with a webhook rather than with intended message channel (Email, In-App, SMS, etc.).
Step 4 – Configure the webhook message steps with the following details:
a. On the Compose tab set the Webhook URL to http://braze-images.com/spacer.gif
b. Select Raw Text for the Request Body and leave it blank.


c. On the Settings tab, set the HTTP Method as GET. No request headers are necessary.
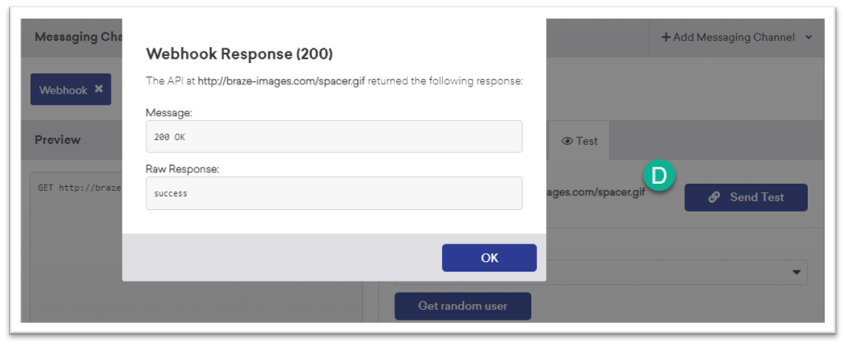
d. Test your webhook by sending a test to a random user. A successful test will return a "Webhook Response (200)”.
Step 5 – Launch the Canvas! Once your canvas is launched, the users that meet the targeted audience and canvas entry properties will enter the canvas. Data will flow through the variants and initial flow components, and the Webhook Message steps will send.
Step 6 – Validate your data workflows by reviewing Active Canvas details. Here you see the real audience count that entered the canvas (total canvas entries), the number of entries for each variant and canvas component, and the audience count for each Webhook Message step. To see the detailed user data for each step or variant, create and export segments that retarget users that entered or received a canvas variant or message step as CSV for analysis.
Step 7 – Save your webhook and go live! Once the data workflows have been validated, replace the webhook steps with your real channel messages and finish your canvas build. You can also save this “blank” webhook as a template to use in the future.
We hope you find this helpful in mitigating testing risks while getting the real view into how your Canvas will perform. We’re always searching more ways to streamline testing and reduce error, so if you have any tips or tricks you use to perfect your messaging, do share!

